Back pain is one of the most common complaints whether from sitting too long, bad posture, or injury. Luckily yoga is a natural and effective way to release tension, strengthen muscles, and improve flexibility.
In this guide, we’ve put together 20 yoga poses to ease back pain. From gentle stretches to strength building, these poses will decompress the spine, release tight muscles, and support overall back health.
Let’s get into the best positions in yoga for back pain:
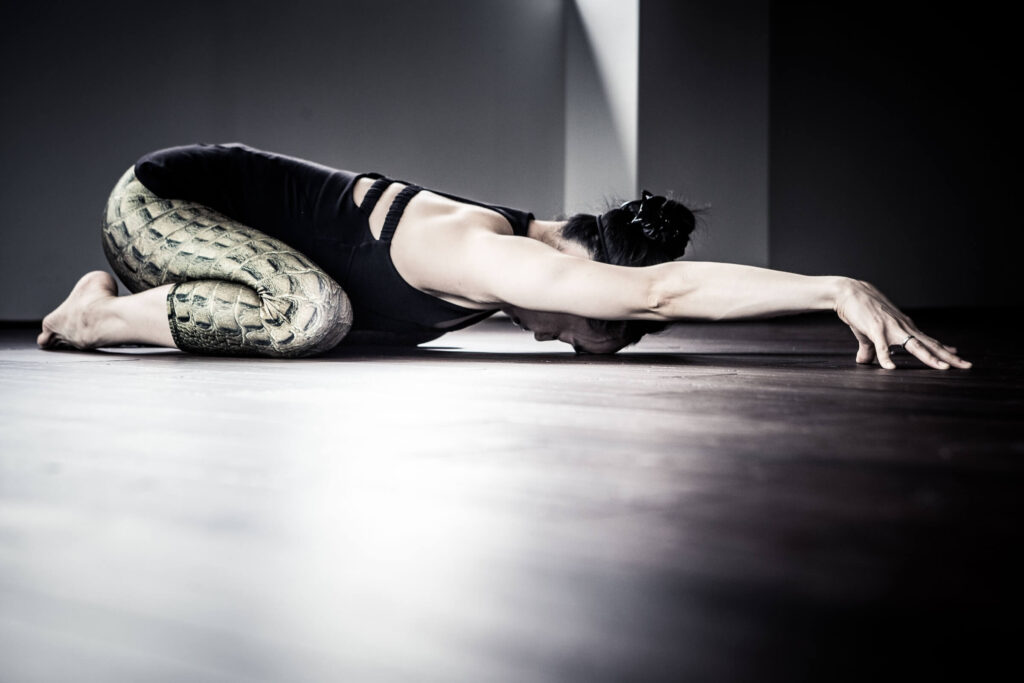
1. Child’s Pose
- Instructions:
Breathe deeply in, then as you release the air, place your torso over your thighs. Draw your ribs away from your tailbone to lengthen your neck and spine. Reach the top of your head away from your shoulders.
With your arms extended in front of you, place your forehead down on the ground. Hold for 30 to 60 seconds.
- Tip:
Focus on elongating your spine by reaching through your arms and grounding your hips. This helps decompress the spine and release tension in the lower back. - Why it helps:
Child’s Pose takes the pressure off the lower back by elongating and aligning the spine. It provides gentle decompression and stretches your hips and thighs, offering relief from tension.
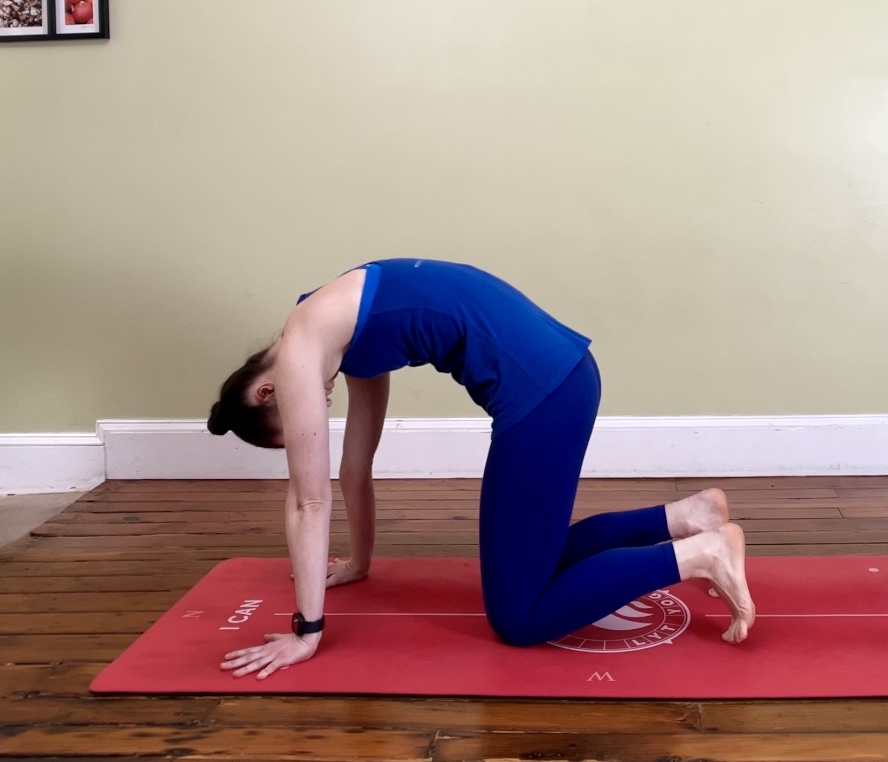
2. Cat/Cow
- Instructions:
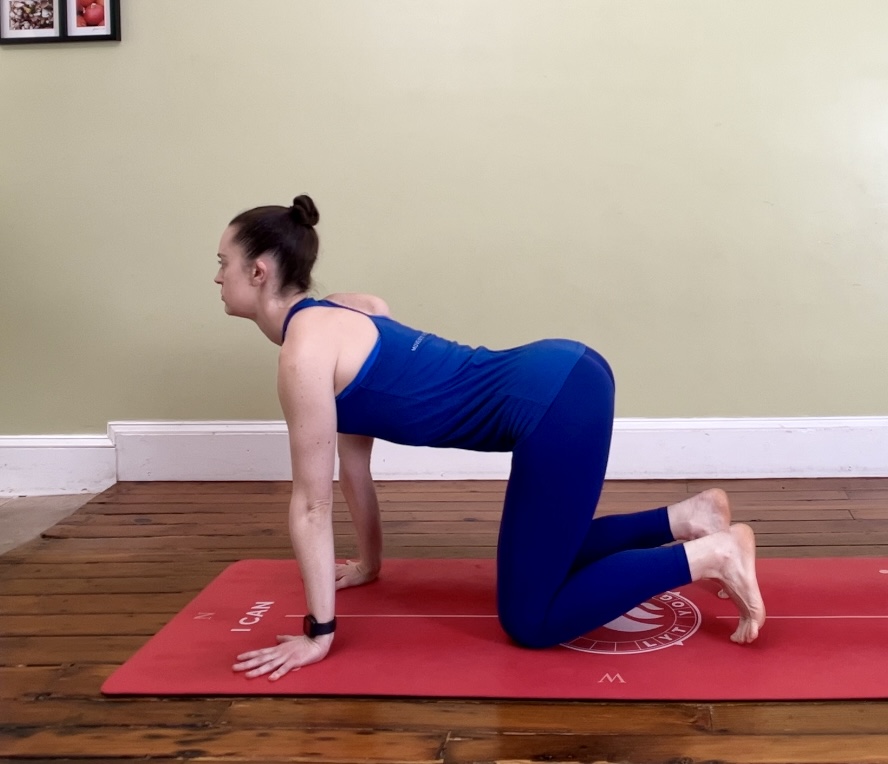
Start on all fours with your shoulders stacked over your wrists and hips over your knees. Inhale deeply, and as you exhale, round your spine and drop your head toward the floor (Cat).
On the next inhale, lift your head, chest, and tailbone toward the ceiling as you arch your back (Cow).
Continue for 30 to 60 seconds.
- Tip:
Move slowly between the two poses, allowing each breath to guide the movement. This controlled movement helps increase flexibility in your spine. - Why it helps:
This sequence allows flexion and extension of the spine, promoting mobility and relieving tension in the lower back. It also helps familiarize you with a neutral spine position, improving posture.
3. Happy Squat
- Instructions:
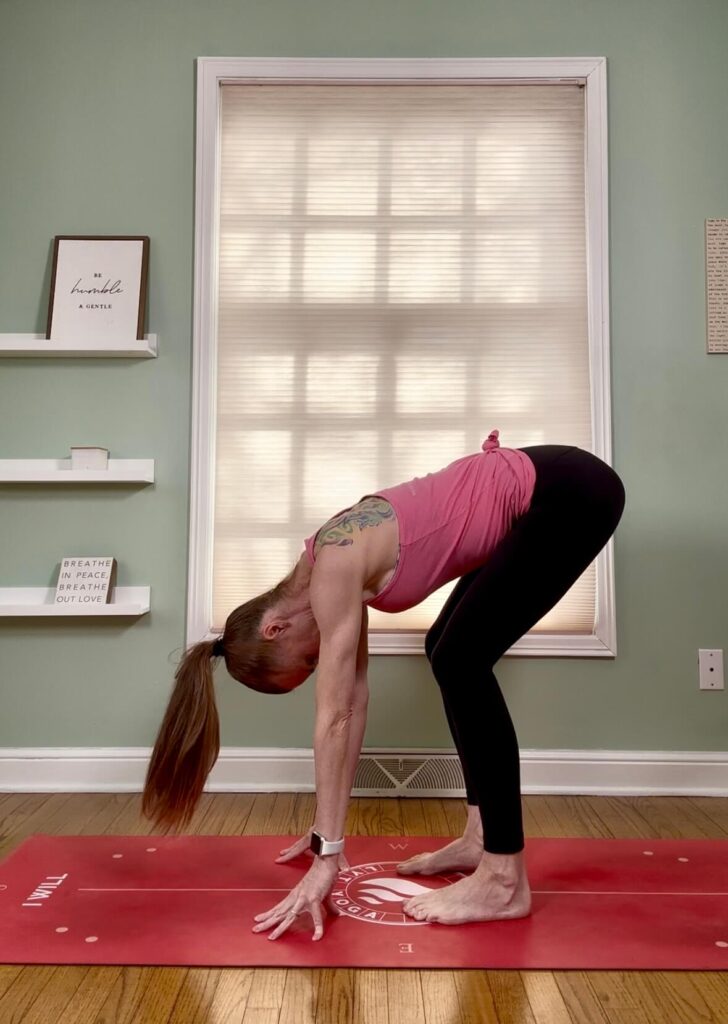
Stand with your feet together, shoulder width apart, and chest lifted. As you exhale, flex at the hips and bend at the knees, keeping the spine long, and bring your torso towards your thighs. You can bring the palms to the floor or use blocks under the hands for more space in the hips.
Hold for 30 to 60 seconds.
- Tip:
If your hamstrings are tight, keep a slight bend in your knees to prevent straining your lower back. - Why it helps:
This pose stretches the hamstrings and calves while lengthening the spine. It can alleviate lower back tightness by releasing tension in the posterior chain of muscles.
4. Sphinx Pose
- Instructions:
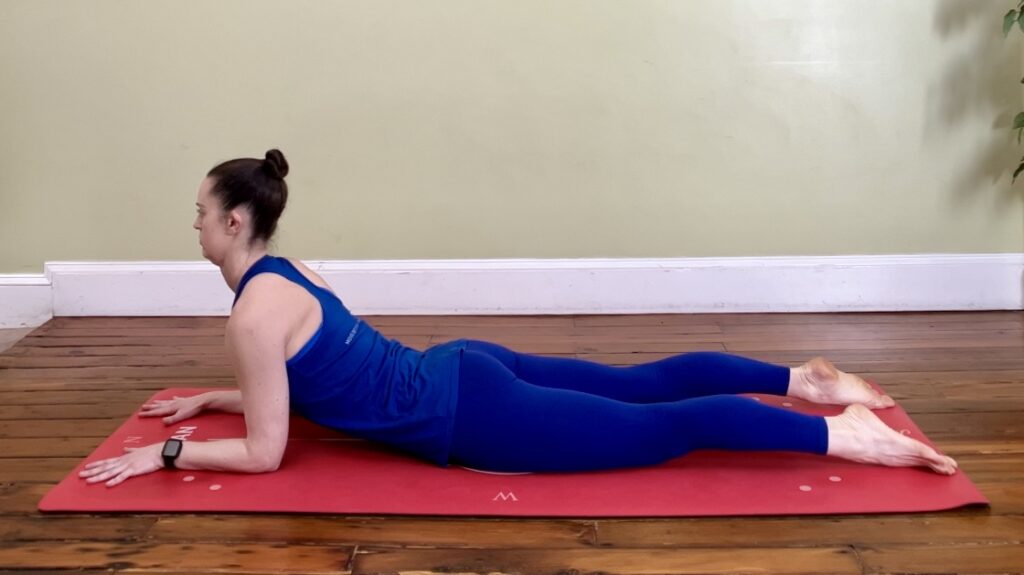
Your legs should be straight behind you as you lie on your stomach. Place your elbows directly under your shoulders and lift your chest off the floor. Press your hips and thighs into the ground and lengthen your spine.
Hold for 30 to 60 seconds.
- Tip:
Engage your core by pulling your belly button toward your spine to prevent hyperextending your lower back. - Why it helps:
Sphinx Pose encourages a natural curve in the lower back and strengthens the core. It helps relieve mild lower back discomfort by gently stretching the spine.
5. Knees to Chest With Slow Rock
- Instructions:
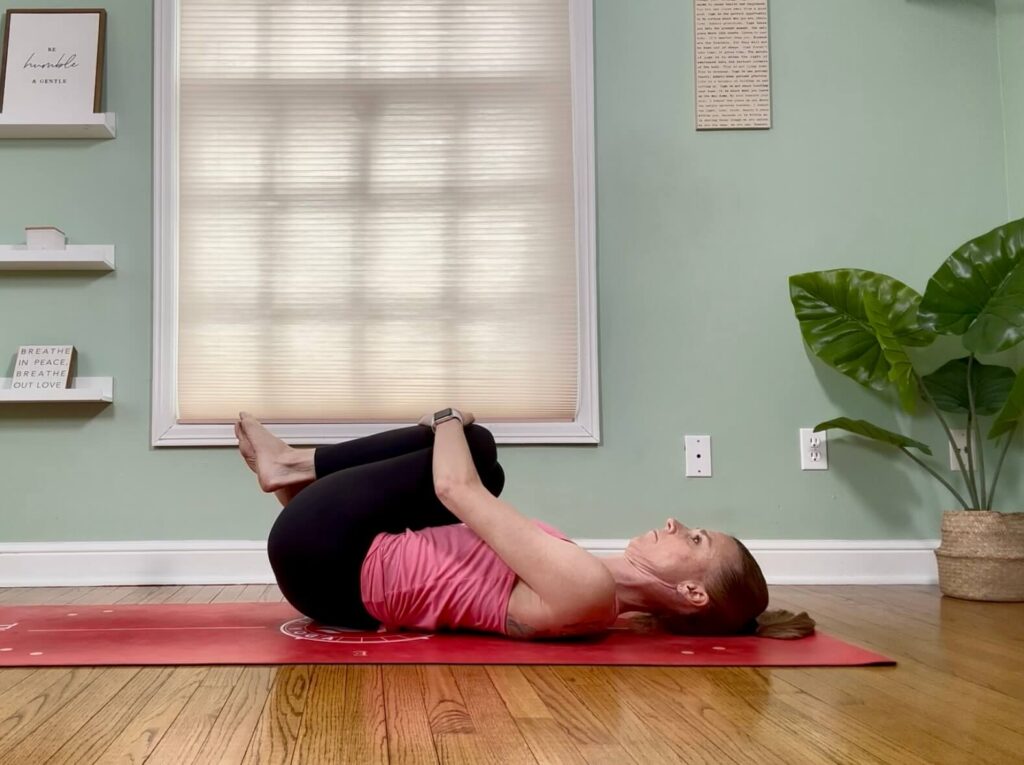
Place yourself on your back and bring both knees close to your chest. Slowly rock your torso back and forth while holding onto your legs.
Continue for 30 to 60 seconds.
- Tip:
Focus on gentle, controlled rocking. This gives your back a soothing massage while releasing tension. - Why it helps:
The rocking motion massages the lower back, relieving tension and promoting spinal flexibility.
6. Reclined Supine Twist
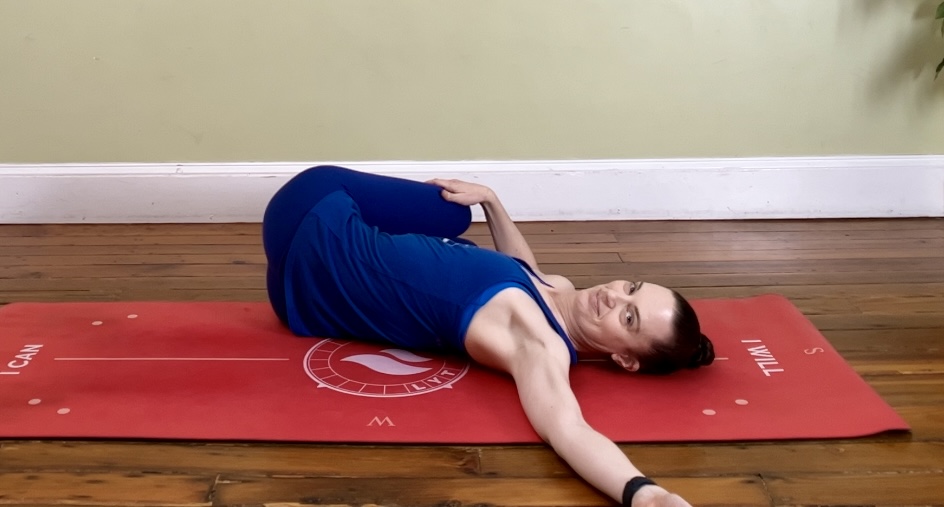
- Instructions:
Cradle your knees to your chest while lying on your back. Drop both knees to one side while twisting your torso in the opposite direction.
Hold for 30 to 60 seconds, then switch sides.
- Tip:
Place the top knee on a block and only rotate to your natural opening range of motion. - Why it helps:
This twist stretches the lower back and can help alleviate tightness. It also enhances spinal mobility, which helps with overall back health.
7. Thread the Needle
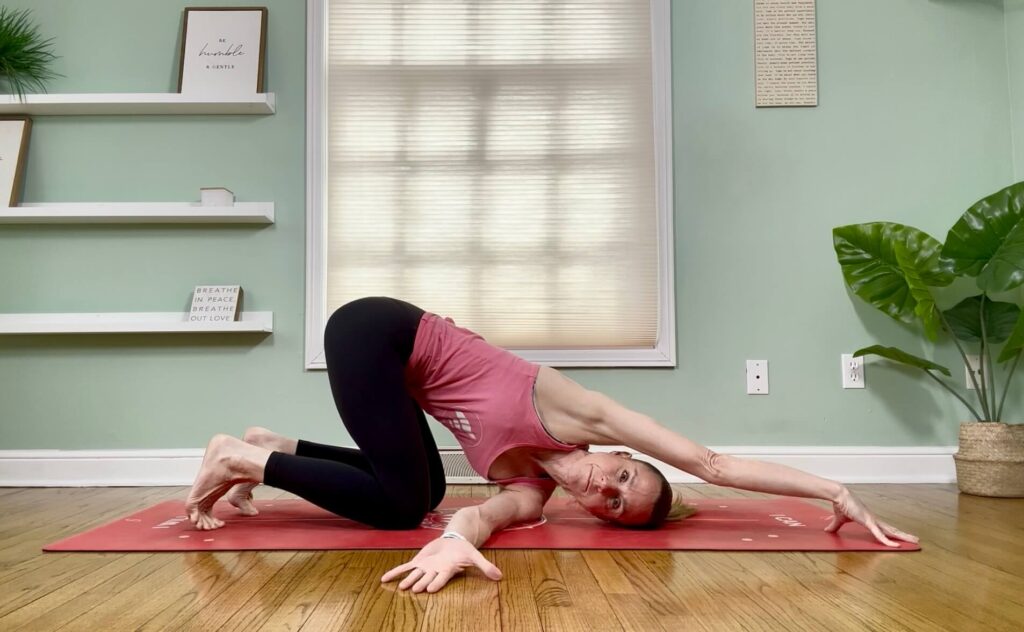
- Instructions:
From a tabletop position, reach your right arm under your left, across your body, palm facing up. Bend your left elbow as you lean into your right side.
Hold for 30 to 60 seconds, then repeat on the other side.
- Tip:
Focus on keeping your hips square and allowing your shoulder to relax into the stretch. - Why it helps:
This stretch targets the upper back and thoracic spine, improving rotational flexibility, which is essential for maintaining a healthy spine.
8. Happy Baby
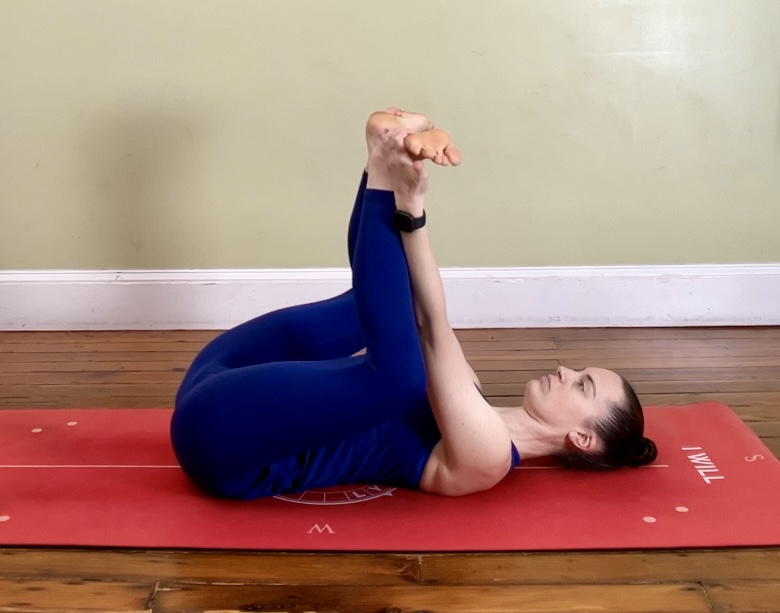
- Instructions:
Lie on your back with both knees bent. Grab the outer edges of your feet and gently pull your feet toward your chest. Keep your back flat on the ground and let your knees lower toward the floor.
Hold for 30 to 60 seconds.
- Tip:
Ensure your lower back stays in contact with the floor to fully engage the stretch. - Why it helps:
Happy Baby gently opens the hips and stretches the lower back, relieving tension while also promoting flexibility in the hips and inner thighs.
9. Reclined Pigeon Pose
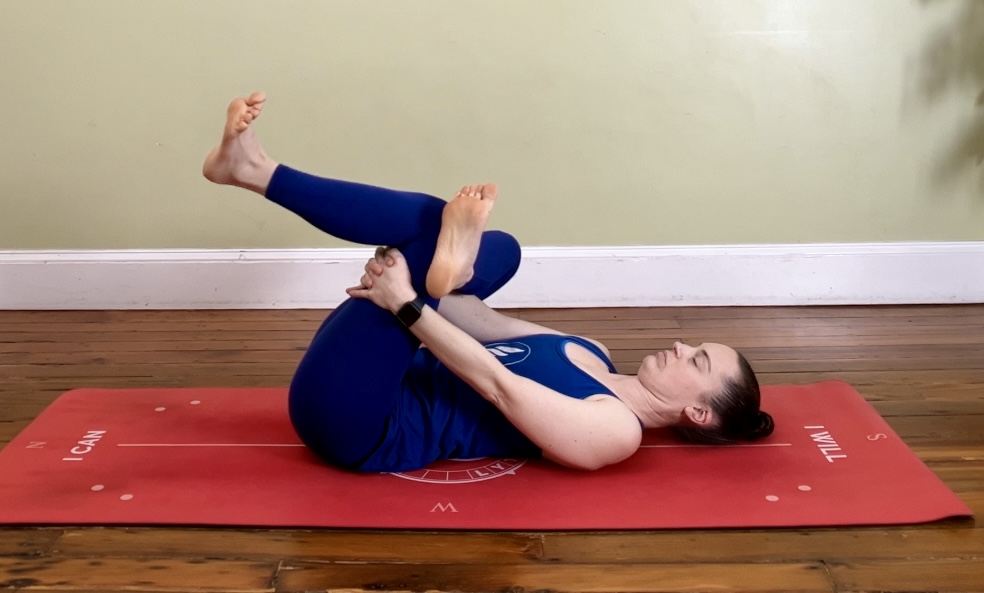
- Instructions:
Lie on your back and cross your right foot over your left thigh. Bend your left knee and hold the back of your left leg, gently pulling it toward your chest.
Hold for 30 to 60 seconds and switch sides.
- Tip:
Keep your spine neutral and relaxed. Don’t pull too hard; aim for a gentle stretch. - Why it helps:
This variation stretches the hips and glutes while protecting the lower back from strain, making it a safer option than the traditional pigeon pose.
10. T-Spine Windmill
- Instructions:
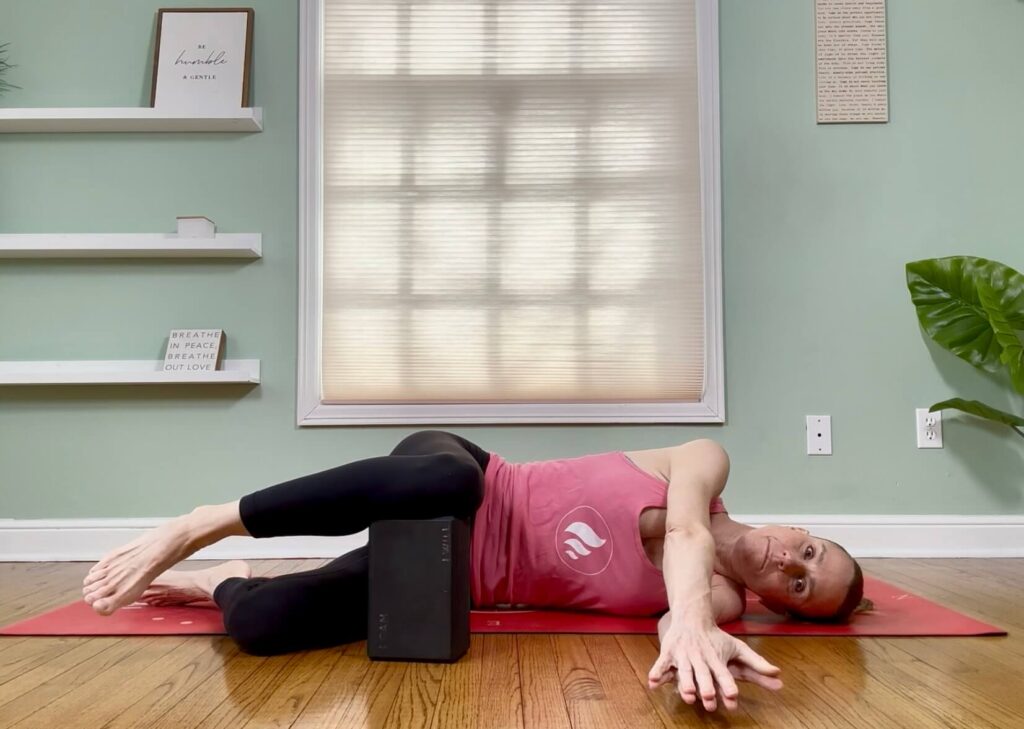
Lie on your right side with knees bent at 90 degrees. Stack your arms together, extended in front of you. Slowly lift your top arm and rotate it toward the opposite side, following the movement with your gaze.
Hold for 10 seconds, then return to the start. Repeat on both sides.
- Tip:
Make sure that your knees stay stacked as you rotate to avoid shifting your hips. - Why it helps:
This movement increases mobility in the mid-spine, improving posture and relieving strain on the lower back.
11. Dead Bug
- Instructions:
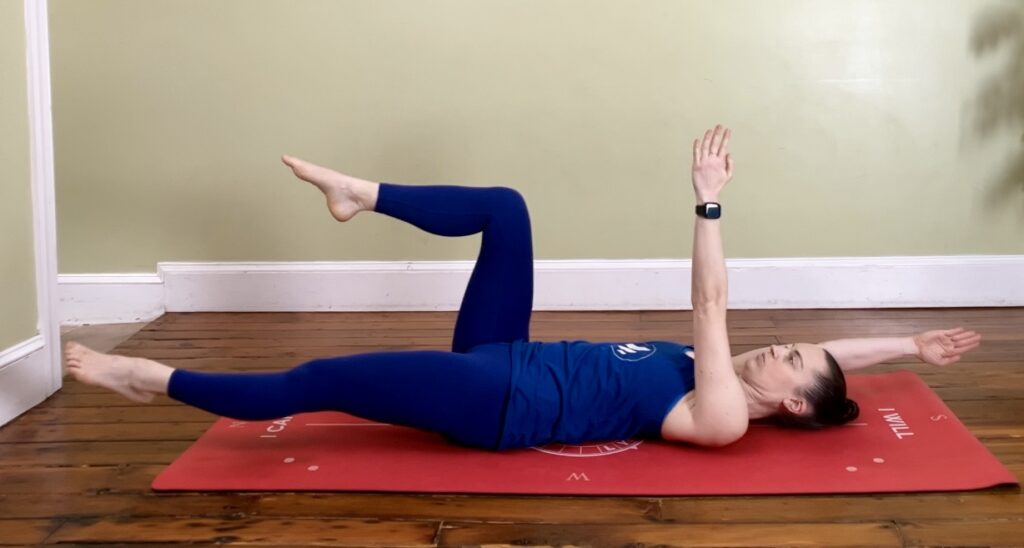
Lay flat on your back with your legs in a tabletop position and your arms extended towards the ceiling. Slowly extend your left leg and right arm toward the floor, keeping them a few inches off the ground. Return to start and switch sides.
Continue for 30 to 60 seconds.
- Tip:
Engage your core throughout the movement, keeping your lower back pressed into the floor to avoid strain. - Why it helps:
Dead Bug strengthens core stability, which supports your spine and prevents back pain.
12. Seated Spinal Twist on Floor
- Instructions:
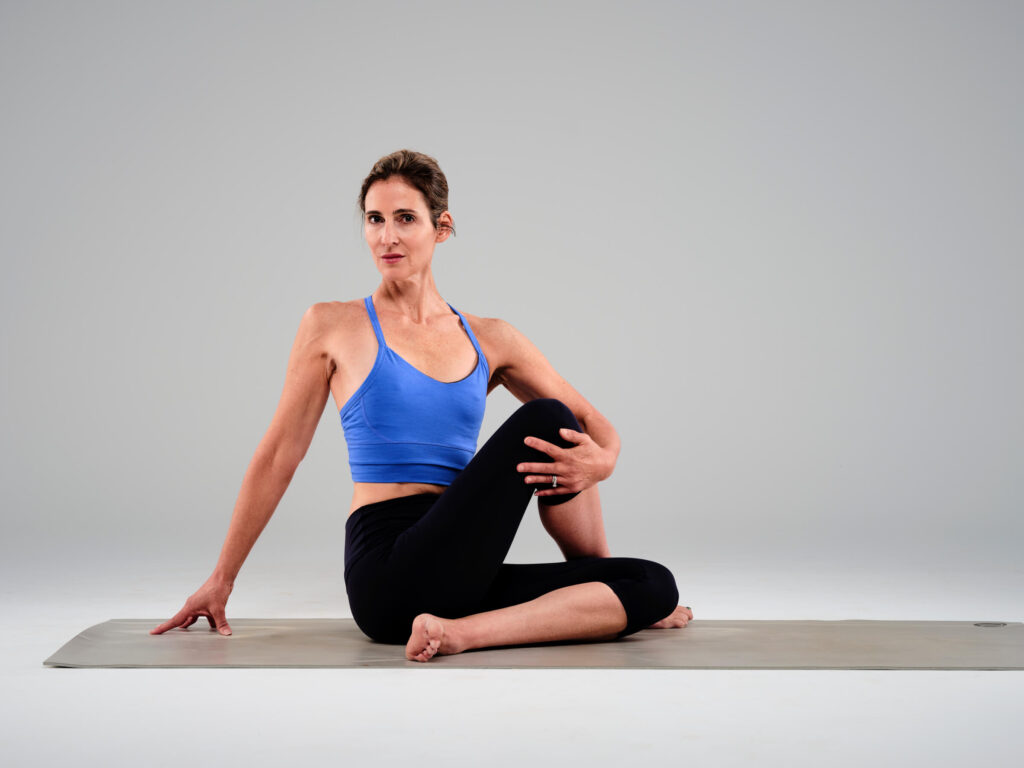
Sit on the floor with your legs crossed. Place both hands on one thigh and rotate your torso to look behind you.
Hold for 10 seconds and repeat on the other side.
- Tip:
Focus on sitting tall to keep your spine elongated while twisting. - Why it helps:
This twist increases flexibility and mobility in the spine, alleviating lower back stiffness.
13. Seated Spinal Twist in Chair
- Instructions:
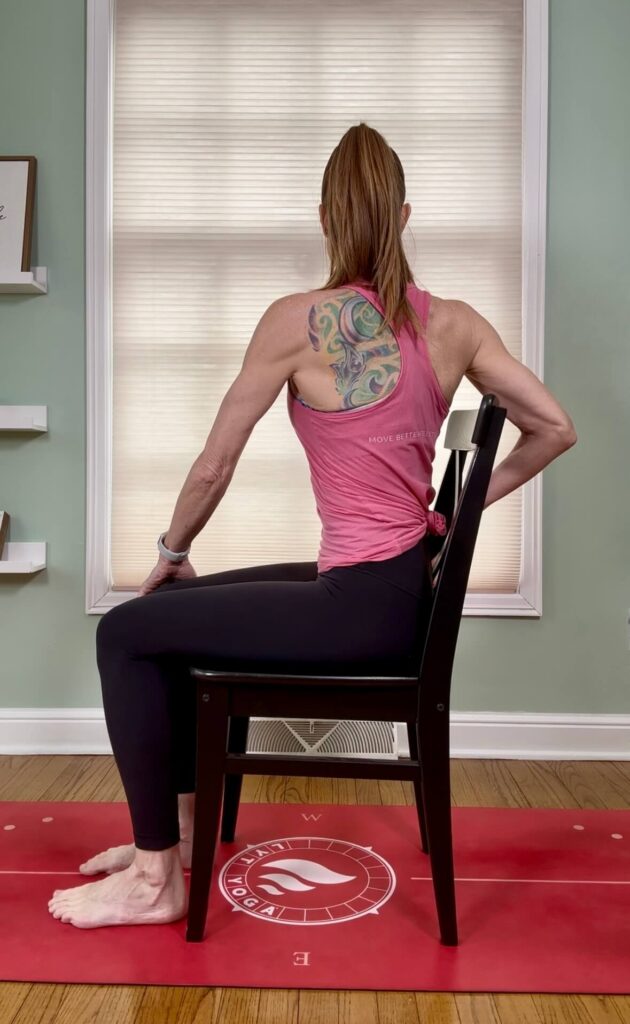
Sit on the chair with your feet flat on the floor, and your back straight. Place both hands on your thighs and gently rotate your torso to one side.
Hold for 10 seconds and repeat on the other side.
- Tip:
Sit up straight before twisting to ensure the movement comes from the spine, not the lower back. - Why it helps:
The chair provides support for those with lower back conditions, while the twist helps improve spinal mobility.
14. Standing Cat/Cow
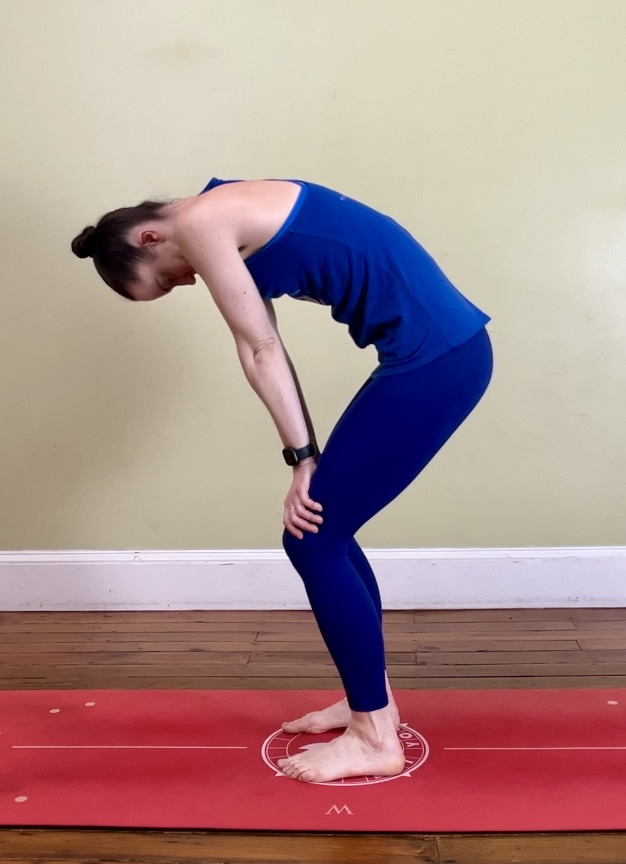
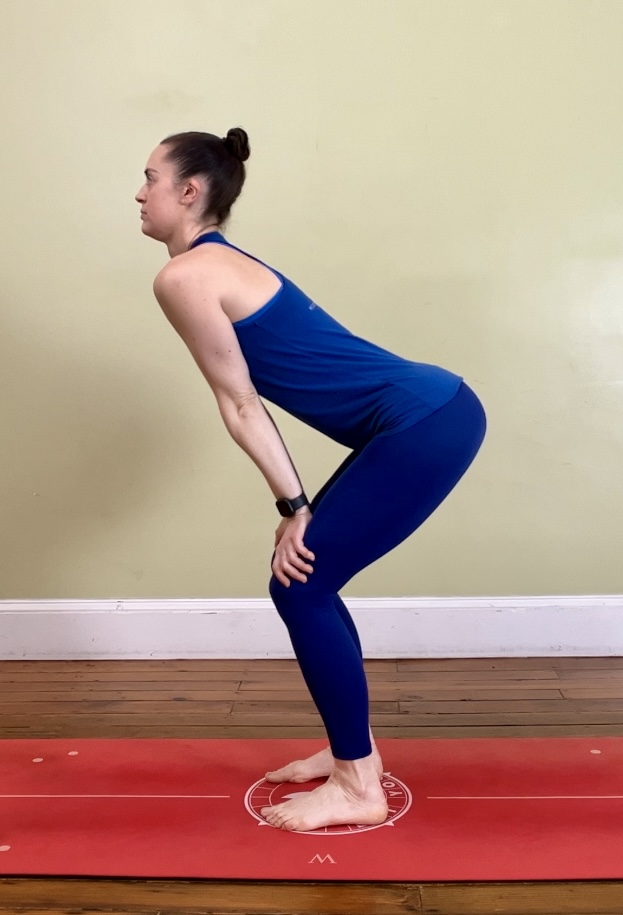
- Instructions:
Stand with feet hip-width apart. Bend your knees slightly and place your hands just above them. Inhale as you lift your chest, arch your back, and exhale as you round your spine.
Hold each position for 3 seconds. Repeat for 30 to 60 seconds.
- Tip:
Use your breath to deepen the movements, promoting a full range of motion. - Why it helps:
Standing Cat/Cow brings gentle movement into your lower back and is great for people who have difficulty getting on the floor.
15. Wide-Leg Forward Fold
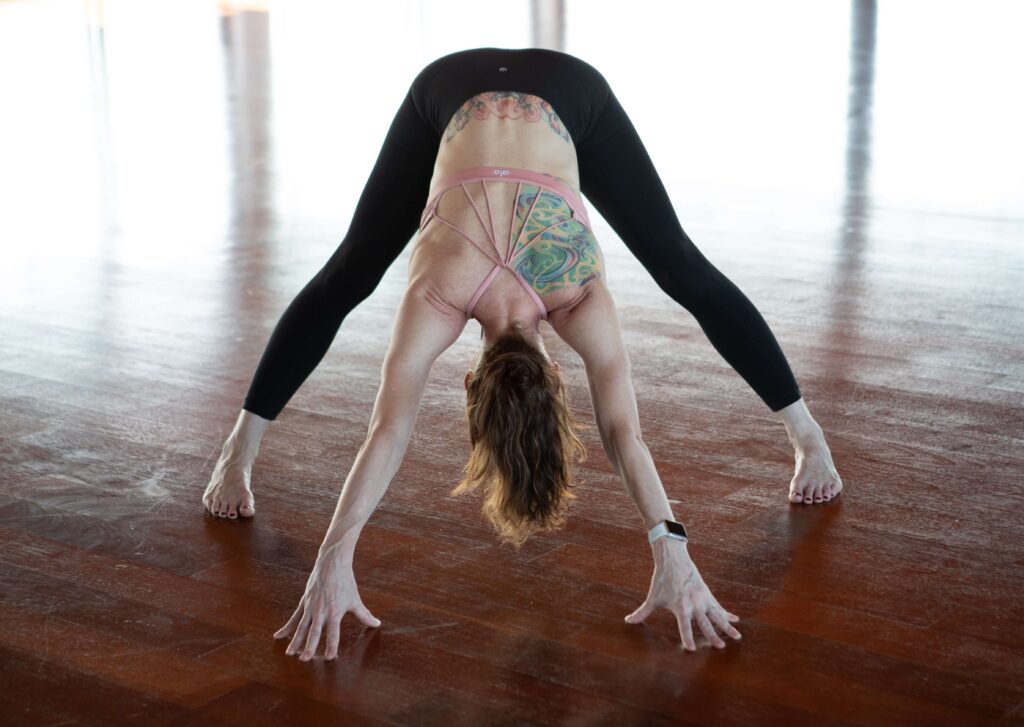
- Instructions:
Stand with your feet wider than shoulder-width apart. Exhale as you flex at the hips, bend at the knees, and bring your fingertips to the floor, keeping the spine long.
Hold for 30 to 60 seconds.
- Tip:
If you’re tight in the hamstrings, bend your knees slightly to prevent pulling on your lower back. - Why it helps:
This pose stretches the hamstrings, lower back, and spine, relieving tightness while taking tension off your outer thighs.
16. Downward-Facing Dog
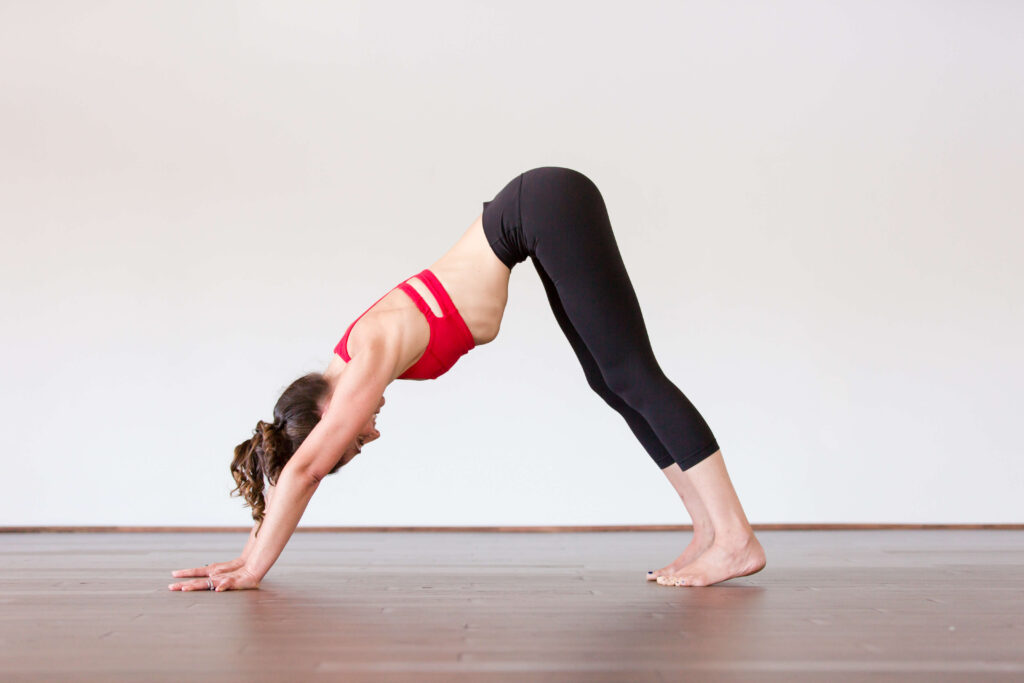
- Instructions: Start on all fours, then lift your hips toward the ceiling, forming an inverted V-shape with your body. Bend the knees and lift the heels, lengthening the spine. Watch that you don’t sink into your shoulder joints, so stay lifted in the armpits.
Hold for 30 to 60 seconds.
- Tip: Focus on lengthening your spine by reaching your hips high and pressing your shoulders away from your ears.
- Why it helps: This pose lengthens the spine, stretches the hamstrings, and can relieve tension in the lower back.
17. Twisted Crescent
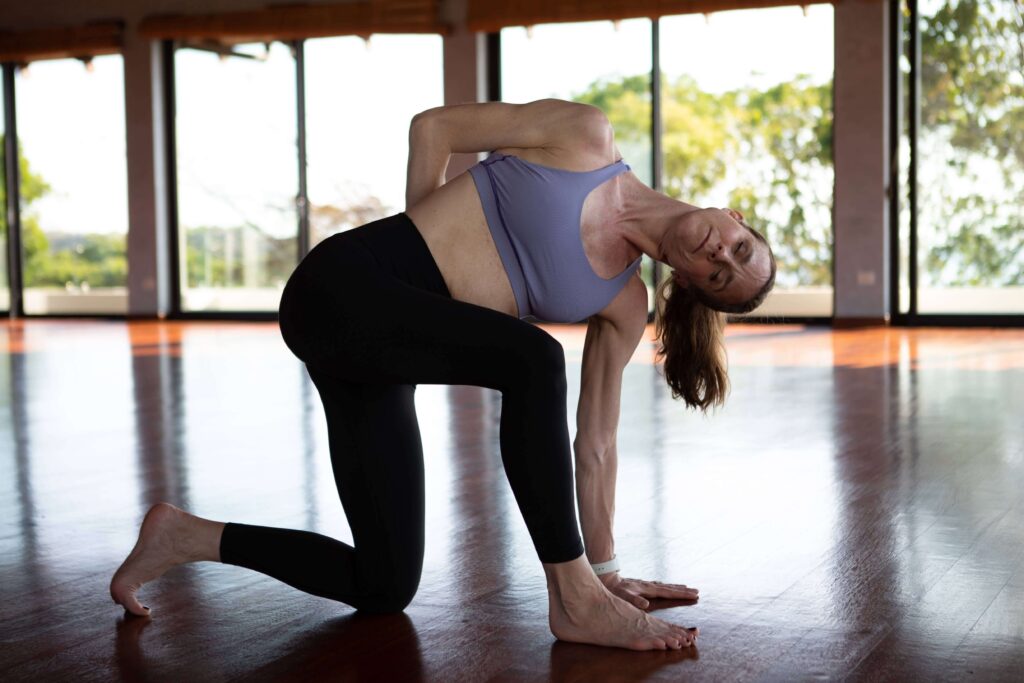
- Instructions: Step your right foot back to a Low Lunge, dropping the knee to the floor directly under your hip. Plant the right hand onto the floor or a block inside the left foot and lift the right knee off the floor.
Rotate through the sternum towards the front knee, reaching the left arm to the ceiling. Keep the gaze towards the side wall directly in front of you.
Hold for 30 to 60 seconds, then switch sides.
- Tip: Keep both sides of your torso long and avoid collapsing into the stretch.
- Why it helps: This pose stretches the spine, opens the hips, and strengthens the core, which can alleviate back pain.
18. Cobra Pose
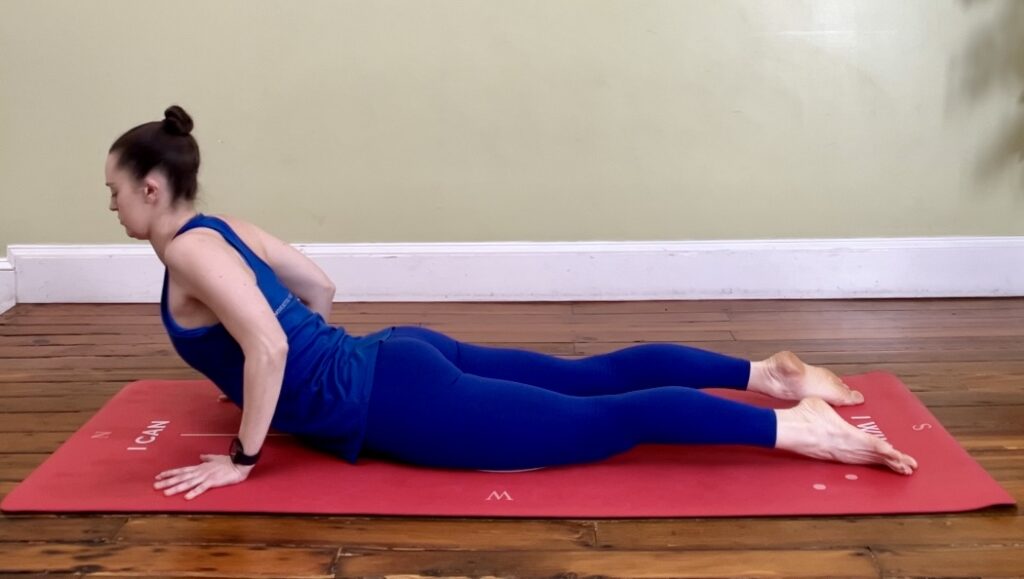
- Instructions: Lie on your stomach with your hands under your shoulders. Press into your palms and lift your chest off the floor, keeping your elbows slightly bent.
Hold for 30 to 60 seconds.
- Tip: Engage your core to avoid overextending your lower back.
- Why it helps: Cobra Pose strengthens the spine and stretches the chest, helping to ease lower back discomfort.
19. Locust Pose
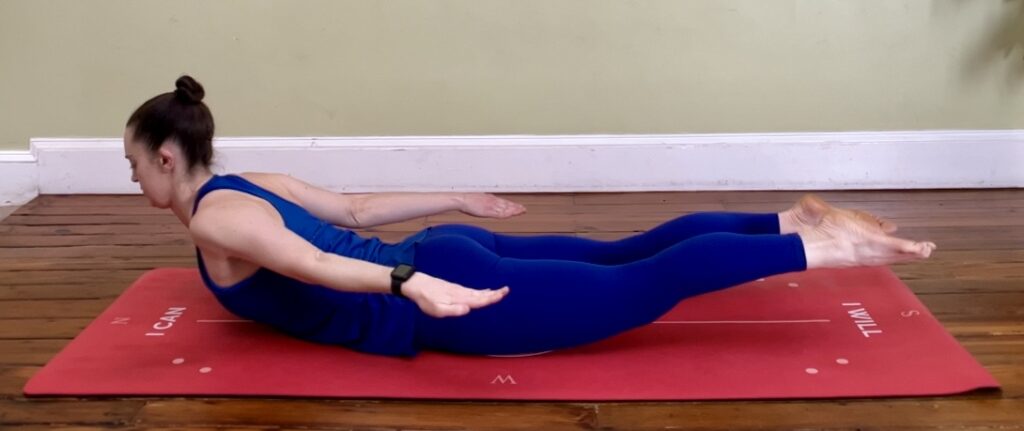
- Instructions: Lie face down with your arms by your sides. Inhale and lift your head, chest, arms, and legs off the floor.
Hold for 30 to 60 seconds.
- Tip: Focus on lifting from your back muscles rather than your arms or legs.
- Why it helps: This pose strengthens the lower back and improves posture, which can reduce back pain.
20. Low Bridge Pose
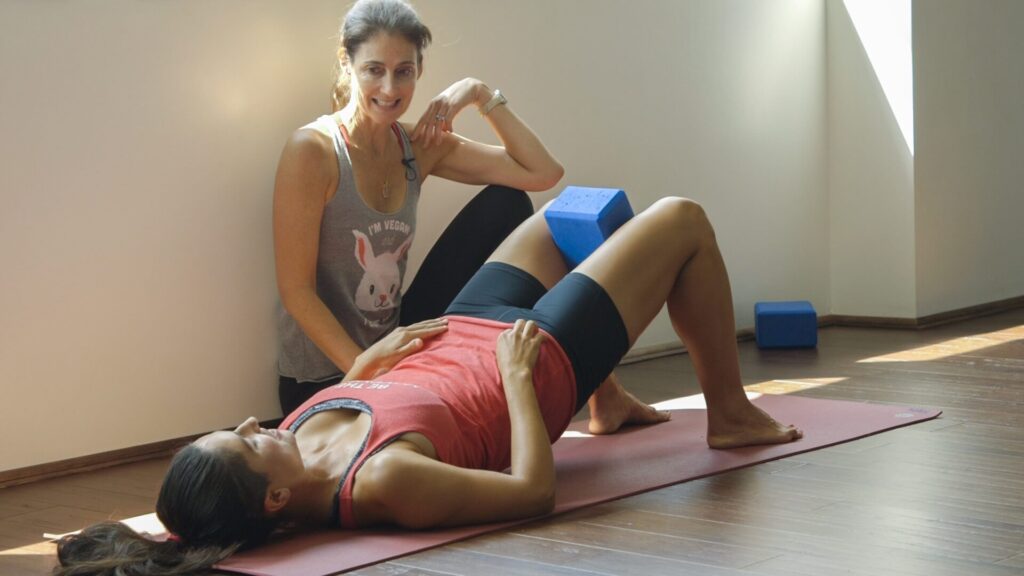
- Instructions: Lie on your back with knees bent and feet flat on the floor, hip-width apart. Press into your feet and lift your hips toward the ceiling, keeping your rib cage on the ground.
Hold for 30 to 60 seconds.
- Tip: Engage your glutes and core to protect your lower back.
- Why it helps: Bridge Pose strengthens the glutes and lower back, promoting spinal alignment and relieving tension.
Does Yoga for Back Pain Work?
The effectiveness of yoga for pain in general has gained considerable attention, and research suggests that it can be a helpful tool for managing discomfort.
Several studies have shown that practicing yoga can lead to significant improvements in both pain levels and mobility. For instance, research of multiple trials found that individuals with chronic lower back pain experienced moderate reductions in pain and improved physical function after participating in regular yoga sessions.
Yoga works by promoting flexibility, strengthening key muscle groups, and improving posture – all of which contribute to spinal health. Many people report less reliance on pain medications and an overall enhancement in their quality of life after incorporating yoga into their routines.


